In this blog we'll show you how to integrate BookSteam scheduling links into your Wix webpage. Let's start.
1. Login into your Wix account.
2. In the Wix App Market search for 'html app' and then click 'Add App'. (At this time it is not possible to add HTML code directly to the source code of your Wix site without this app).

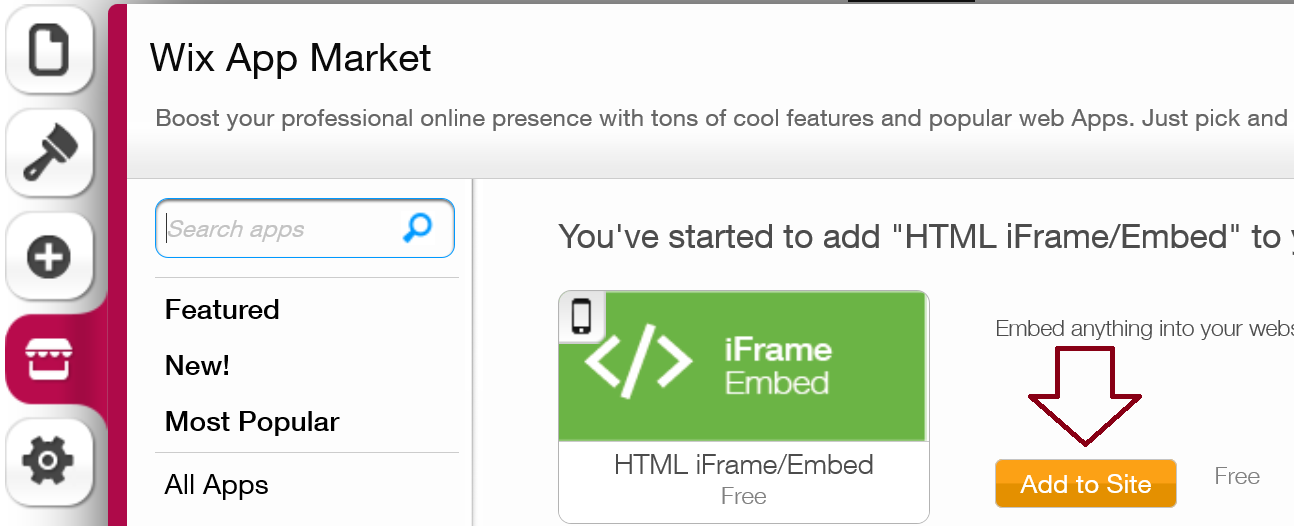
3. Click 'Add to Site'.

4. In the Mode select 'HTML code'.
5. Login into your BookSteam account here. If you want to link BookSteam scheduling "Book Now" button into your Wix page, navigate to the "Marketing" tab, and on the left hand side select "BookNow Button", select size of the button you prefer and copy your code, see below.
6. Go back to your Wix account and paste it into the HTML/embed code field and click 'Update'.
7. Now, drag box wherever you want your 'Book Now' button to be and at the top right click 'Save' following by 'Publish'.
8. "Book Now" button now added to your Wix webpage. Your clients can now visit your live website and start booking their appointments online.
If you want to integrate 'Booksteam Widget in body', in your BookSteam account navigate to the 'Marketing' tab, on the left hand side select 'Website Widgets'. Select 'Booksteam Widget in body', pick which booking link to load (if you want to load main page just leave it default) and then copy the code below.
Now, follow Step 6 above and drag the box wherever you want your 'BookSteam Widget in body' to be. Click 'Save' following by 'Publish', your booking widget will now be live:
And you're done! Thank you for choosing BookSteam.
Related blog posts: GoDaddy, Google Sites, Jimdo, Joomla, Squarespace, Weebly, Wordpress, Yola
1. Login into your Wix account.
2. In the Wix App Market search for 'html app' and then click 'Add App'. (At this time it is not possible to add HTML code directly to the source code of your Wix site without this app).

3. Click 'Add to Site'.

4. In the Mode select 'HTML code'.
5. Login into your BookSteam account here. If you want to link BookSteam scheduling "Book Now" button into your Wix page, navigate to the "Marketing" tab, and on the left hand side select "BookNow Button", select size of the button you prefer and copy your code, see below.
6. Go back to your Wix account and paste it into the HTML/embed code field and click 'Update'.
7. Now, drag box wherever you want your 'Book Now' button to be and at the top right click 'Save' following by 'Publish'.
8. "Book Now" button now added to your Wix webpage. Your clients can now visit your live website and start booking their appointments online.
If you want to integrate 'Booksteam Widget in body', in your BookSteam account navigate to the 'Marketing' tab, on the left hand side select 'Website Widgets'. Select 'Booksteam Widget in body', pick which booking link to load (if you want to load main page just leave it default) and then copy the code below.
Now, follow Step 6 above and drag the box wherever you want your 'BookSteam Widget in body' to be. Click 'Save' following by 'Publish', your booking widget will now be live:
And you're done! Thank you for choosing BookSteam.
Related blog posts: GoDaddy, Google Sites, Jimdo, Joomla, Squarespace, Weebly, Wordpress, Yola


